Friday, February 26, 2010

hide-disable-remove-blogger navbar from your blog

Learn how to hide,disable or remove the blogger navbar(navigation bar) from your blog.
First,let us see what blogger navbar is:

blogger navbar


Blogger navbar allows users to easily navigate to other random blogs and it also has a feauture to search the blogs ,and mark any blog as spam.
So,now you have a clear idea of what really a blogger navbar is.So, why so many people prefer to just remove the navbar inspite of the feautures it has like search,etc.Many people think that, it spoils the look of the blog,especially if your blog has differnet subtitle layout which looks too obvious to see for a visitor.Well, let me come to the actual point on how to disable or hide your blogger navbar.

Below is the step-by-step procedure on how to do it with photos to make it easy to understand.

1.Sign in to your blogger account and click the layout button next to your blog name

click the layout button


2.Next,click the edit html tab as shown in the below picture.


edit html


3.Add the below html code as specified in the below picture.

#navbar {
height: 0px;
visibility: hidden;
display: none;
}


add the code like this

4. Save the changes.

Now, you can see your blog without that navbar(this tip can only hides the navbar,it doesn't completely delete it).If you want the navbar to appear again,just remove that code and save the changes.
If you have any doubts,regarding this post,don't hesitate to ask.You can ask your doubts via comments to this post.

Five Reasons Why Google Buzz Will Continue to Buzz Out

Several days after it was rolled out, some users may have already buzz out of Google Buzz and totally muted out Gmail Buzz. While some continue to use it as I for one keeps on getting buzz updates from those I follow. The good thing about this is that Google quickly responded to various privacy concerns and other so called buzz kills that were aired by users. Google has just dropped the auto-follow feature, disconnected Google Reader and Picasa Web Album and added a Buzz tab in Gmail settings so that you can easily disable Buzz totally.

But there are still other buzz kills that Google need to address although I don’t think that these may affect Google Buzz own demised. Yes, folks whether you agree or not, I think that Google has successfully came out with a killer social sharing/communication tool once again. And I could see users continously buzzing out in the coming days. Here are five reasons why Buzz will continue to make a killing in the social blogosphere.

1. Google Buzz is an effective communication tool

Whether you like it or not, people will continue to use Google Buzz, be it inside Gmail or on their mobile phone. Why? Because it’s an effective, no-cost, real-time communication tool. Despite the noise it makes, Google Buzz effectively lets you share information and links, communicate with a group of people, find out about what’s going on with what’s going on with the lives of the people you follow and more. It’s a bit short of becoming Facebook and a bit more than a Twitter-like service.

2. Google Buzz is neither a Twitter nor Facebook killer

Stop saying that Google Buzz is going to kill Twitter or Facebook – it won’t. There will always be loyal Twitter users as there are Facebook users. Soon, there will be loyal Google Buzz users, who may also be using Twitter and Facebook or using only Google Buzz to network and socialize. It’s just going to be a matter of preference.

3. Google Buzz is a Google Product/Service

I’ve always believe that if it’s from Google, it must be good somehow. Yes, despite the many flaws and shortcomings of the Nexus One, many still believe (including myself) that it is a great smartphone. And like the Nexus One, while we may have some qualms about Google Buzz, pretty soon those qualms will vanish as soon as we grow accustomed to Google Buzz’s intricancies and appreciate its merits.

4. Google Buzz is quick way to build social groups

Whether you like Google Buzz’s auto-follow feature or prefer the auto-suggest feature that was just rolled out by Google, Buzz is a great way to build social groups. Whether from your existing Gmail contacts or new contacts that you’ll stumble upon through Google Buzz’s nearby feature. Google Buzz instantly creates a social group where each member actively participates in the discussion.

5. Google Buzz is a noisemaker

Yes, I believe Google Buzz has created so much noise during its first week of run. It added some noise to my Google Reader account as the feeds shared by my Google Buzz contacts in their Google Reader accounts started showing up on my account. But while you may not like those noise, if you take a look at some of them, you’d find out that some of these noise are information, useful and helpful at some point or another. Noise can be a good thing some times.

Twitter Auto Follow Tools and Scripts

follow-me-on-twitterHave you ever wonder why some company starts following you as soon you are mentioning it’s name on Twitter? Or some user instantly follows you back if you start following to his tweets? These are techniques used by many to gain popularity on Twitter.


If you also want to use some Auto follow techniques this list of free available tools may help you.

Tools:

Hummingbird – Very powerful marketing tool for Twitter

Twollow – it auto-follows everyone that mentions your specified keywords on Twitter.

TweerLater – many interesting automated features including auto-follow/auto-unfollow.

SocialToo – Auto-following and auto-following filter together – interesting! Works for Facebook too.

Scripts:

christopherspenn.com – PHP script that auto-follows anyone that follows you.

staynalive.com – script does exactly the same thing that previous – follows anyone that follows you.

raduboncea.ro – same script in python together with direct message to those that follow you.


Follow me and I will follow you immediately http://twitter.com/taurusofstar

Thursday, February 25, 2010

How to Settings your blog?

How to Settings your blog?

If your blog want caried by google, you must doing several settings. This is how to setting your blog:

  1. Login to blogger.com with your ID.


  2. If your blog more than 1, click at the blog title want to setting.


  3. Click Setting and then click Basic. Several form that must in the contents to the menu basic:


    • Title : Content with your blog title. Example : Blog Tutorial.


    • Description : Content with your description blog. Example : All about blogging can find here.


    • Add your blog to our listing : chose Yes, so that every time posting always entered the Blogger.com list.


    • Show Quick Editing on your blog : Chose Yes.


    • Show Email post link : It is best to chose Yes, but if you chose No also it's allright.


    • Show compose Mode for all your blog : Chose Yes.


    • Show transliteration button for your post : chose Yes if the you wanted to be button to change normally alphabet to hindi (India) alphabet, Chose No if being the reverse.


    • Click Save Settings.


    • Finish.


  4. Click Publishing to arrange the publishing menu.


    • Blog’Spot Address : Content with your blog address. Example : kolom-tutorial.


    • Send Pings : Chose Yes.


    • Click Save Settings.


    • Finish.


  5. Click Formatting to arrange the formatting menu.


    • Show : Chose the number of post want you to display in your blog. Example : Show : 6 post, it's means your posting will display in your page Totally six posting. Chose Post (don't days) at pulldown menu


    • Date header Format : Chose the style of date/month what you wanted, this date/month will display above your post.


    • Archive Index Date Format : Chose the style for your archive


    • Timestamp Format : Chose the style of the time, what you wanted.


    • Time Zone : Chose the matching zone with your place. Example for WIB : [UTC+7.00] jakarta.


    • Language : Chose language what you wanted.


    • Convert line break : Chose Yes, but if you chose No it's allright.


    • Show Link Field : Chose No, but if you chose Yes it's allright.


    • Enable Float aligment : Chose Yes, but if you chose No it's allright.


    • Click Save Settings.

    • Finish.


  6. Click Comment to arrange the Comment menu.


    • Comments : Chose Show.


    • Who Comment? Chose Anyone. It's means anyone can comment to your post.


    • Comments Default for Post : Chose New post Have Comments


    • Back links : Chose Show. It's means you will know if another people has linked to your post.


    • Backlinks default for Posts : Chose New post have Backlinks.


    • Show comments in a popup window? : Chose Yes. It's means when the people click Comment link your blog not lost.


    • Show word verification for comments? : It's better to chose Yes


    • Enable comment moderation? : Chose No, but if you wanted chose Yes it's allright.


    • Show profile images on comments? : Chose Yes. It's means the photo of commentator of blogger member can display.


    • Comment Notification Address : Content with your email address.


    • Click SAVE SETTINGS.


    • Finish.


  7. Click ARCHIVING to arrange the archiving menu.


    • Archive Frequency : Chose monthly.


    • enable Post Pages? : Chose Yes.


    • Click SAVE SETTINGS.


    • Finish.


  8. Click Site Feed.


    • Publish Site Feed : Chose Yes.


    • Descriptions : Chose Full


    • Article Footer : If you have advertising code like Google Adsense, you can insert the code here.


    • Click SAVE SETTINGS.


    • Finish.

Submit blogger sitemap to yahoo to index your web pages

This post explains how to submit your blogger sitemap to Yahoo.By submitting your sitemap to yahoo, they will index your web pages in yahoo search engine and provide you with detailed information related to your blog like which pages are linking to yours,popular pages in your site and you can submit and track feeds for your sites.
Also,you have the choice to delete any urls of your blog if you won't want to index certain pages of your site.
Submitting your site to yahoo is easy and give your web pages more exposure.
All you need is a YAHOO ACCOUNT(ID).However,you don't need an yahoo ID to know the information like how many pages are indexed,etc.But,if your blog is a new one or no pages in your blog are indexed(type your blog url in yahoo search and see to check whether your web pages are indexed or not), then you want Yahoo id to submit your sites,feeds,etc.
Let't see how to make yahoo index your webpages by submitting your blog sitemap.
1.Go to Yahoo Site Explorer


2.Click on the 'Sign in' link which is at the top of the page,see the screenshot below(If you don't have a Yahoo id, you can get one here) and sign into your accoutnt.

click on the 'sign in link'

3.Type your blog url in the box provided as shown in the below screenshot.Don't forget to replace the 'yourblogurl' with the original url of your blog and click on the 'Add My Site'

4.After adding your site,you need to Authenticate(Verify your ownership).
There are two ways to verify your ownership.One is to upload a file to the root directory of your site which can't be possible in blogger.

Another one is to 'adding a metatag' which is possible and the only way to verify ownership for bloggers.First,copy the metatag..
Next,sign in to your blogger account>Edit html and paste the metatag below the head tag and SAVE THE CHANGES,look at the screenshot below.

Next,you will get a message saying that 'Your site is pending authentication'

Note:Don't remove the metatag,they will revalidate your ownership by checking your ownership regularly.

5.Next,go back to the 'Site explorer home', and check the box next to your blog url and click on the Manage button.


6.Type rss.xml or atom.xml in the box provided.It helps yahoo to discover more of your site content via your rss or atom feeds and to index your blog pages quickly whenever your blog is updated.Next,click on the add feed button.


That's it.Now,you have sucessfully submitted your blog sitemap to yahoo.Check your account after a couple of days and you will see your blog indexed in yahoo search engine.

Meanwhile,if you didn't submitted your blog sitemap to google,please read this about How to Submit your blog sitemap to Google

how to submit blogger sitemap to google-useful tip for new bloggers

This tip explains how to generate and submit blogger sitemap to google webmaster tools:
Before doing this,let me say what are sitemaps and how they will help us.The reason we use them is,they will help google bot to crawl,index pages of your site and tell you if there are any problems when they try to index it.It also helps you to know,how many pages exactly are indexed,and what people searched in the search engine to visit your site.
Let me explain the detailed procedure on how to submit your blogger sitemap to google.
1.First,go to google webmaster tools and sign in with your gmail account.
2.After you logged in, you will see this asking you to add a site.
google webmaster tools
Add your blog url(ex:kranthitips.blogspot.com).Don't add with http or www.

3.Next,it asks you to verify your site.It is just to confirm whether you are the owner or not.

CLICK on the 'verify your site' link.

click the 'verify your site' link


Next,

choose verification method


4.There are two ways to verify your ownership but, there is only one way for the blogger users to add a metatag.

copy the metatag

5.Copy the metatag.

Now,sign into your blogger account>click the layout button>Edit html and paste the metatag just after the head tag and save the changes.

paste the metatag like this
and click the verify button in the google webmaster tools and there will be a confirmation message saying that you have sucessfully verified.


conformation message

Now,you have to submit a sitemap for google to crawl your site.Go back to the google webmaster dashboard or (home) and click the 'Add' link which is next to your blog name and in the Sitemaps column.Then,you see this,


Choose 'Add general web sitemap' from the dropdown menu and type rss.xml or atom.xml next to your blog address as shown below


or

and click the 'Add General Web Sitemap' button.

6.That's it.Now your sitemap is successfully submitted to google.Check 2 or 3 days after and you will see the detailed statistics of your blog(indexed pages,any errors,etc.)

If you have any questions regarding this,you can ask here via your comments


Source: Bloggertricks

Submit blog to blog directories and increase the traffic

This post explains how to increase your blog traffic by submitting your blog to different kinds of blog directories which rates,provide statistics about your blog and provide free traffic and maximum exposure to your blog.
Submitting your blog to these directories is a very good thing to do particularly if your blog is very new one with low traffic.
These blog directories have high pageranks than your blog(since your blog is a new one with pagerank Zero).So, if someone searches for a particular keyword,there is more possibility for the blog directory to appear in the results than yours.So,by adding your blog to these directories,the visitors enters these directories containing your articles(when they click the article,they enter your site) and also your blog posts will be indexed little faster.So,submitting your blog to these directories will gain you more traffic.
(If your blog is a new one,then put a visitors tracker button in your blog,sothat you will see how many visitors are coming from these directories,from search engines,visitors geolocation,etc).

Here are a few popular visitor tracker websites:

1.Histats(histats.com)
2.Sitemeter(sitemeter.com)
3.Statcounter(Statcounter.com)
So,let me come to the main topic...
Before submitting your blog to these blog directories,my personal suggestion is to create a new email address for this purpose so,your personal emails can't flooded with the emails from the blog directories administrators,etc.)Creating an email is free lol....creat one.

Many of these directories asks you to register before submitting blogs.
There are so many hundreds of blog directories,here is the list of very good popular directories which will send you maximum traffic.


LIST OF POPULAR BLOG DIRECTORIES:

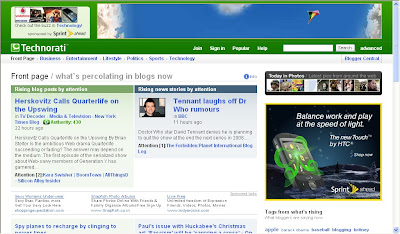
Technorati:Technorati is the largest blog(weblog) directory currently tracking more than 112.8 million blogs.Join technorati and verify your authorship,then you will be provided with detailed statistics regarding your blog,how many blogs are linking to your blog,(they call it 'authority').It is one of the best blog directory and will send tons of triffic if your blog is regularly updated.

Topblogarea:This is another big blog directory which rates and rank the blogs interms of Unique visitors your blog gets.They start the counting from Zero every week, so that even newly submitted blog can have the chance to rank higher in the list.

Topblogging.com:This is another source of weblogs which also rank the blogs according to the unique hits they get.Nice blog resource,bring you lots of traffic to your blog.
Blogtoplist:Same here,they rank according to the unique hits you get.But,there is a little change, they will give you to place a voting button in your blog.If any visitor votes for your site from your blog,that is equal to 100 unique hits,but there is only one chance per visitor(one IP address) a day.

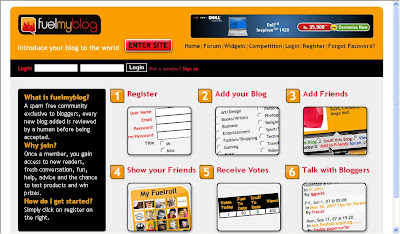
Fuelmyblog:This is a cool weblog resource which is different from the ones we discussed so far.You can vote to other blogs and others vote to you.They will keep the top six blogs(voted the most) on the homepage.You can join their forums, read other blogs content,joining in the compitetions and win prizes,etc.

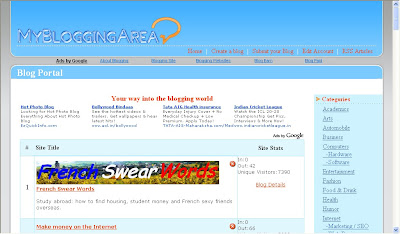
MyBloggingarea:This is a very good weblog directory which ranks the blogs accoring to the unique visitors they get,brought me so much traffic to my celebrity blog than all the other blog directories.I recommend this.

BlogCatalog:It is another good blogging resource,you can promote your blog here for FREE,find other blogs related to yours,etc.They have a special formula to rank the blogs,the more visitors,hits,comments,neighbourhood you get the more your rank will be.Another recommended one.You can join their forums,discussion board,groups,etc with other bloggers and share your thoughts.

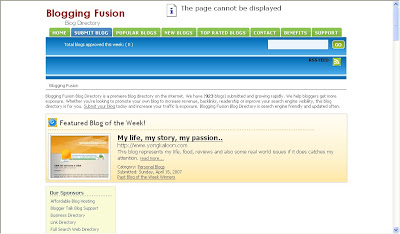
BloggingFusion:It is a new one and not a very big one(around 950 blogs) at this time.But,it is a good one and doing pretty well.You can increase your blog exposure, worth a link to it.

Bloghop:You can find blogs related to your blog topic here.Have a nice tracking button and currently having more than 29,000 blogs.

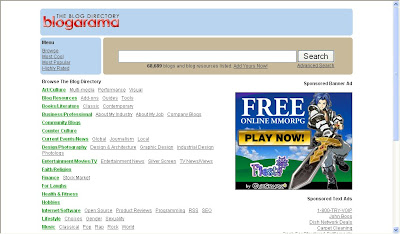
Blogarama:Cool weblog directory currently having more than 69,000 blogs.It will list the blogs in terms of the score your blog have.The score depends on so many things like incoming traffic,outgoing traffic,user ratings,etc. and if you send more traffic to they,they will list your blog in the top 100 blogs.

Topbloglists:Another blog directory which will rank your blog according to the unique hits your blog will get.


Myblogdirectory:This doesn't list blogs interms of any visitors,etc. All blogs are listed randomly so,every blog get the same exposure.If you sent more traffic from your blog to them,your blog will be choosen as a BLOG OF THE DAY which will be placed on the homepage and your blog will recieve the whole traffic their site gets on that day.


Blogroll.net:Another blog resouce which rank accorking to the votes and unique hits your blog get.

how-to-embed-YOUTUBE video,movie in your blog

This post explains, how to embed(insert) a youtube video in your blogger blog:
So,you want to embed a video(movie) onto your blog.The process is very simple,even a dummie can do it.If you want to embed your original video,then first sign up for an account in youtube and upload your video and get the embed code.
Otherwise,you can easily embed any public youtube video in your blog.Go to youtube.com and search for the video.For example,if you want to embed a britney spears video,search it and copy the embed code on to a windows notepad or anything else.
The following process is explained below with pictures for easy understanding.


1.Go to youtube.com and search for your required video
enter your search item and click the search button
2.Copy the embeded code(ctrl+c) and paste(ctrl+v) it in windows notepad.


copy the copy the html code from the box provided


3.Sign in in to your blogger acoount and click the New Post button and next,select the option 'Edit html' as shown below and paste the html code as shown below.

click the 'edit html' option as shown here


4.Publish the post.That's it, as you can see now,the youtube video is embeded in your post properly.
NOTE:You can change the width and height of the video by replacing the values to your desirable ones.
If you have any doubts regarding to this post,feel free to ask it here via your comments.

Top 5 Ways to get Free One Way Backlinks to your site


One way backlinks are very critical to any website success. The more one way backlinks pointing to your site, the more your Google Pagerank and the more amount of traffic you will get. This should also increase your sales,etc.
But the thing is.. getting the right and quality one way backlinks from high pagerank sites is not an easy task, and in this article, we'll find out some of the best ways to get free one way backlinks:

1. Try to write as much quality content as you can... that will encourage the readers to link to your site. The more useful, informative content you post, the more likely people are to link it. But, this method can take a while to really pay off because like all the new websites, you don't get much traffic.

2. Write quality articles and submit them to top article directories like ezinearticles and goarticles. The advantage in this is, you'll not only get a backlink from high pagerank directories, but also you'll find that your articles are used on other people's sites with a backlink to your site.

3. Participate in forums,discussion boards that are related to your website's niche and add a link to your site in the signature. Make sure that you write quality posts, don't spam. This will also help you get some decent traffic to your site.

4. There is absolutely nothing wrong to get a backlink from a related blog post you decide to comment on. This is one of the effective way of one way link building especially if you comment often on blogs. Comment on blogs related to your niche with a link back to your site as your signature.. and Again, make sure you never spam.

5. Submit your site link to major, well known web directories. Getting listed in directories related to your site not only bring you tons of targetted traffic, but will also improve your search engine rankings. Some of the popular directories to get listed in are DMOZ directory and Yahoo directory. You can submit your link to both paid and free directories and they worth your time.

How to add adsense ads inside Blogger blog posts or between blog posts:-

Adding adsense ads inside blog posts is a very good thing to do to increase your CTR.
CTR means"(the number of times your ad clicked) divided by (number of times it is shown).So,the more CTR you have,the more $$ you get.

As we know,there are more chances for the ads to be clicked when they are in the middle(blog posts) rather than at the sidebars(especially the right sidebar),footer,etc.So,


How to place adsense ads between Blog posts:

By doing this,the adsense units will be displayed between the blog posts in the homepage,archive pages and permalink(individual post pages).
Follow the procedure to do this:

1.Sign in to your blogger dashboard>click on the layout link

click on the layout link

2.Click on the Edit link in the "Blog Posts' column[look at the below screenshot]
click on Edit ..............a pop up window opens..........

3.Check the box next to 'Show ads between Posts'

next,configure the ads,choose the format,colours,etc and SAVE THE CHANGES.
configure the ads That's it! Now your adsense ads will show between blog posts.


If you want to know how to add the adsense ads inside the blog post rather than between the post, follow this:-

Showing adsense ads inside Blogger blog Posts:-

1.Sign in to your blogger dashboard>layout>Edit html

Check the box next to 'Expand Widget Templates'


2.Scroll down the window till you see this code


3.Replace that code in the template with the below code


4.Again,scroll down the template and find out data-post body tag[look at the below screenshot]
and paste the below code just above that code{this will show ads above the post body}.If you want ads to show below the post,paste the code below that tag.

Here is the code to paste:-

That's it!

Leave you comments if you like the post or if you have any questions doubts.

Wow!How fast Google crawling this site

As you can see below,I just created an article on How to track your blog visitors? and this is what I got when I typed the url of this article in Google after just posting the article.
Wow! as you can see below,google crawled it in just 1 minute.I know there are so many out there waiting days and days for google to crawl their websites/blogs and I wondered how fast is google crawling this site!
Write an article and check how much time it is taking for google to crawl your blog and share your comments here.

how fast google is crawling this site


FASTEST WAY FOR GOOGLE TO CRAWL YOUR BLOG:

you commnet-I follow!

This is a do follow site.If your blog is new or if it is taking too much time to crawl your site,No Problem! Make google to crawl your site faster by leaving comments here with a link back to your blog.

Note:All comments must be relative to the blog post.

UPDATE:

And even better........look at this!

even better this time!


Source: Here