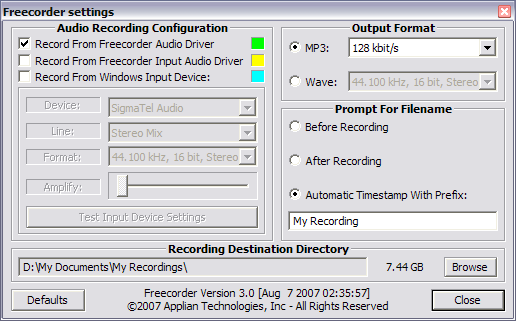
Ever wonder how you could possibly record or rip a song that’s being streamed across the Internet onto your computer for free? Trying to download streaming audio directly to your computer can be quite difficult because different sites have different security measures put in place, so one program might work for one site, but not another.
Thursday, April 22, 2010
How to create a secured and locked folder in Windows XP
UPDATE: Since some people were having issues with this method of hiding a folder in XP (folder being renamed incorrectly, visible via the command prompt, etc), I am adding to the bottom another way to permanently hide a folder using a program called Free Hide Folder. Please scroll down to read about it.
If you’ve come across this page looking for a way to create a password protected, secure, hidden or locked folder in Windows XP for free, you’ve come to the right place. Unfortunately, Windows XP does not have any user-friendly built-in tools to create secure folders on computers with multiple users. Of course, you can encrypt data on your hard disk, but this only helps if your computer is stolen.
In a previous post, I wrote about how you can hide a folder in Windows XP using a rudimentary built-in feature. This method is useful if you want to hide a folder or file and you’re pretty sure that anyone who is using the computer will have no idea how to un-hide the data. If you’re dealing with someone a little more computer savvy, there is another way to create a secure locked folder without having to buy any 3rd party software.
It basically involves using a script to morph the folder into something completely different so that it’s still visible, but nothing inside the folder is accessible. In order to view the data, you have to run another script to morph it back. Anyone who clicks on the folder will be brought to the Control Panel and simply think it is a shortcut.
Here are the steps to create the protected folder in Windows XP:
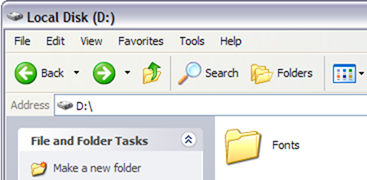
- First create a folder that you will use to store your confidential data. For example, I have created a folder called Fonts at the root of my D drive. Since the hidden folder will bring you to the Control Panel, it’s best to name the folder as one of the programs inside there.
Labels:
folder security,
hide folders,
how to lock folders xp,
how to secure folders,
password protect folders,
protect folders,
windows xp
How to hide files in JPEG pictures
If you’re looking to hide files on your PC hard drive, you may have read about ways to encrypt folders or change the attributes on a file so that they cannot be accessed by prying eyes. However, a lot of times hiding files or folders in that way requires that you install some sort of software on your computer, which could then be spotted by someone else.
I’ve actually written quite a few articles on how you can hide files and folders in Windows XP and Vista before, but here I’m going to show you a new way to hide files that is very counter-intuitive and therefore pretty safe! Using a simple trick in Windows, you can actually hide a file inside of the JPG picture file!
You can actually hide any type of file inside of an image file, including txt, exe, mp3, avi, or whatever else. Not only that, you can actually store many files inside of single JPG file, not just one! This can come in very handy if you need to hide files and don’t want to bother with encryption and all that other technical stuff.
Labels:
hide file in image,
hide file in picture,
hide file in pictures,
hide files,
hiding files in pictures
How to detect computer & email monitoring or spying software
As an IT Pro, I routinely monitor employee’s computers and emails. It’s essential in a work environment for administrative purposes as well as for security. Monitoring email, for example, allows you to block attachments that could contain a virus or spyware. The only time I have to connect to a user’s computer and do work on directly their computer is to fix a problem.
However, if you feel that you are being monitored when you shouldn’t be, there are a few little tricks you can use to determine if you’re right. First off, to monitor someone’s computer means that they someone can watch everything that you are doing on your computer in real time. Blocking porn sites, removing attachments or blocking spam before it gets to your Inbox, etc is not really monitoring, it’s more like filtering.
However, if you feel that you are being monitored when you shouldn’t be, there are a few little tricks you can use to determine if you’re right. First off, to monitor someone’s computer means that they someone can watch everything that you are doing on your computer in real time. Blocking porn sites, removing attachments or blocking spam before it gets to your Inbox, etc is not really monitoring, it’s more like filtering.
Labels:
anti-spying,
detect monitoring software,
detect spying software,
detecting spy software,
remote spying
How to convert a PDF file to Word, Excel or JPG format
One common question I’ve run across a lot these days in the office is how to convert a PDF file to Microsoft Word format (doc), Excel format (xls), or JPG picture format. Usually, people want to know how to convert a file to PDF, but it’s also nice to be able to convert back the other way. Converting to Word is actually pretty simple and can be done directly using an online file conversion service called Zamzar. Going to Excel or JPG is a two step process, but nothing very difficult to follow.
Update: There’s a much easier way to convert a PDF to JPG image format than the method I have mentioned below. Here’s how you can do it using Zamzar.com.
That’s it! By the way, if youare interested in how to extract the text from a PDF document or how to convert Word files to PDF, etc, check out the links.
Update: There’s a much easier way to convert a PDF to JPG image format than the method I have mentioned below. Here’s how you can do it using Zamzar.com.
Convert a PDF file to JPG – Easy Way
Go to ZamZar.com, browse for your file and choose PNG format for the format to conver to under Step 2. PNG is another newer picture format that is slowly replacing the JPG format. Most programs that can open JPG files can open PNG. Zamzar automatically converts each page in the PDF document into it’s own PNG picture file. Now you can simply open Microsoft Paint (yes, all you need it Paint!) and choose File – Save As from the menu and choose JPEG from the drop down list of formats.That’s it! By the way, if youare interested in how to extract the text from a PDF document or how to convert Word files to PDF, etc, check out the links.
How to track the original location of an email via its IP address
Here’s a quick how-to guide on how you can track email to it’s originating location by figuring out the email’s IP address and looking it up. I have found this to be quite useful on many occasions for verification purposes since I receive lots of emails daily due to my blog. Tracking the IP address of an email sender does require looking at some technical details, so be ready to dig your heels in!
There are basically two steps involved in the process of tracking an email: find the IP address in the email header section and then look up the location of the IP address.
Google’s Gmail
1. Log into your account and open the email in question.
2. Click on the down arrow that’s to the right of the Reply link. Choose Show Original from the list.
Now here’s the technical part that I was telling you about earlier! You need to look for the lines of text that start with “Received: from“. It might be easier to simply press Cntrl + F and perform a search for that phase. You’ll notice that there are several Received From’s in the message header. This is because the message header contains the IP addresses of all of servers involved in routing that email to you.
To find the first computer that originally sent the email, you’ll have to find the Received From that’s farthest DOWN. As you can see from the above image, the first one is from a computer called “aseem” with the IP address 72.204.154.191. Then it was routed to my ISP’s server at eastrmmtao104.cox.net and so on and so forth till it got to your email server.
The computer aseem is my personal home computer and that’s my public IP address for my house! I’ll go through Yahoo and Outlook before talking about tracking the location of that IP address.
Yahoo Mail Beta
1. Log into your account and open the email (if you’re using Yahoo Mail Beta with the new preview interface, make sure you double-click on the email so that it opens in a new tab)
2. At the top right, you’ll see there is a drop-down option where Standard Header is selected by default.
3. Click on it and choose Full Header.
Again, you’ll see the same information as before, just in a different window:
Microsoft Outlook
1. Open the email in Outlook by double-clicking on it
2. Go to View at the top menu (the menu options for the email, not the main Outlook window) and choose Options.
You’ll get a dialog box where you can set the message options and at the bottom you’ll see the Internet Headers box. For some silly reason, the box is very small and you have to scroll a lot, so it’s best to simply copy and paste the text into Notepad to view it more easily.
GeoBytes gave me a big map of New Orleans, LA along with a bunch of other information about the location itself.
IP2Location also gave me the same information pretty much, including the ISP (Cox Communications). Of course, this is correct since I live in New Orleans!
If you want more information, you can do a WHOIS database search also. My favorite one is the ARIN WHOIS Database Search. This will give you information on who hosts that IP address and their registration information. You can always contact them to try and find more information on that particular IP address.
Have fun tracking down those emails! Questions, comments, or suggestions? Post a comment!
There are basically two steps involved in the process of tracking an email: find the IP address in the email header section and then look up the location of the IP address.
Finding the IP address of an email sender in GMail, Yahoo Mail, and Outlook
Let’s go ahead and take a look at how you would do this for Google, Yahoo and Outlook since those are the most popular email clients.Google’s Gmail
1. Log into your account and open the email in question.
2. Click on the down arrow that’s to the right of the Reply link. Choose Show Original from the list.
Now here’s the technical part that I was telling you about earlier! You need to look for the lines of text that start with “Received: from“. It might be easier to simply press Cntrl + F and perform a search for that phase. You’ll notice that there are several Received From’s in the message header. This is because the message header contains the IP addresses of all of servers involved in routing that email to you.
To find the first computer that originally sent the email, you’ll have to find the Received From that’s farthest DOWN. As you can see from the above image, the first one is from a computer called “aseem” with the IP address 72.204.154.191. Then it was routed to my ISP’s server at eastrmmtao104.cox.net and so on and so forth till it got to your email server.
The computer aseem is my personal home computer and that’s my public IP address for my house! I’ll go through Yahoo and Outlook before talking about tracking the location of that IP address.
Yahoo Mail Beta
1. Log into your account and open the email (if you’re using Yahoo Mail Beta with the new preview interface, make sure you double-click on the email so that it opens in a new tab)
2. At the top right, you’ll see there is a drop-down option where Standard Header is selected by default.
3. Click on it and choose Full Header.
Again, you’ll see the same information as before, just in a different window:
Microsoft Outlook
1. Open the email in Outlook by double-clicking on it
2. Go to View at the top menu (the menu options for the email, not the main Outlook window) and choose Options.
You’ll get a dialog box where you can set the message options and at the bottom you’ll see the Internet Headers box. For some silly reason, the box is very small and you have to scroll a lot, so it’s best to simply copy and paste the text into Notepad to view it more easily.
Tracking the location of an IP address
Now that we have our originating IP address of 72.204.154.191, let’s find out where that is! You can do this by perform a location lookup on the IP address. My favorites are IP2Location and GeoBytes IP Locator.GeoBytes gave me a big map of New Orleans, LA along with a bunch of other information about the location itself.
IP2Location also gave me the same information pretty much, including the ISP (Cox Communications). Of course, this is correct since I live in New Orleans!
If you want more information, you can do a WHOIS database search also. My favorite one is the ARIN WHOIS Database Search. This will give you information on who hosts that IP address and their registration information. You can always contact them to try and find more information on that particular IP address.
Have fun tracking down those emails! Questions, comments, or suggestions? Post a comment!
Labels:
find email ip address,
find location,
locate email,
locate ip address,
track an email,
track email,
track email ip
How to connect your Laptop/PC/Computer to your TV
I’m writing this post on how to connect your PC or computer to a TV because last week I returned from a trip in India and wanted to show all of my pictures and videos to my family from my laptop onto our HDTV, but unfortunately I did not have the correct cords and so after fumbling around for 30 minutes trying to connect my computer to the TV, I had to tell everyone that they would have to wait till the next weekend! Pretty annoying considering the times we live in, it should be quite easy to connect the two together!
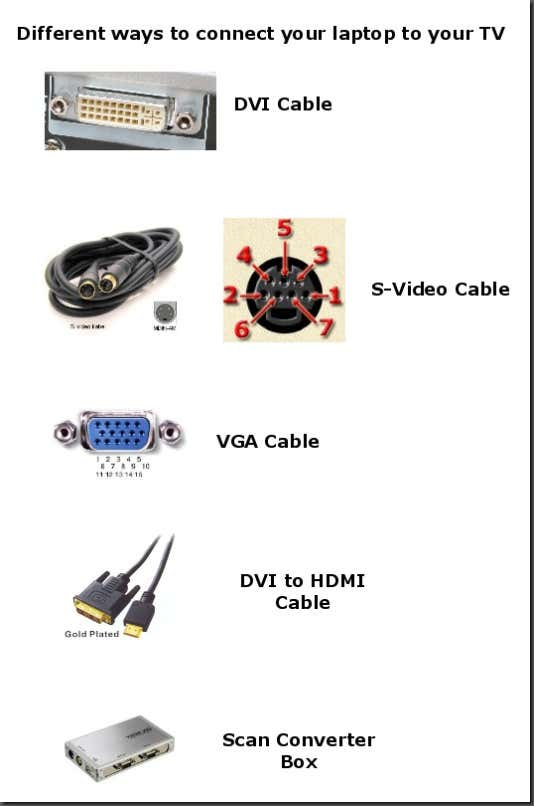
So here’s a quick walk-through of all the methods that I know (if you know any more, please comment) to connect a laptop or PC to your TV:
Tuesday, April 20, 2010
How to make Money at Text Link Ads
Text links ads (TLA) could give you money too beside Google Adsense. They will pay you for every link you post monthly. If you have no Google Adsense, you may try this program too. Perhaps you will get money from this site. Goggle will not ban your account because TLA is different with Adsense.
Subscribe to:
Comments (Atom)


